- Read Tutorial
- Watch Guide Video
It might be a little bit different by the time you're looking at it, but you'll see that all of these have requireAuth on them. I'm going to update this one right now so you'll see this as saying requireAuth.

Basically, that's built by another file with passport and JWT and all that, but what that does is it protects it. You have to provide a JWT token, which is the token we get back when we sign in or sign up. This is in the server you don't need to be in here at all if you don't want to be.
If you're just looking at my screen then you;re good. Basically, it goes in Auth function and it takes that token and it basically it basically authenticates us. It says "hey, this person has a token that is all that is valid. Let's authenticate them and let them into this end point."
By the time you are looking at this, it will look good. Now, it's probably going to to look exactly the same except for those two changes I just made. Anyway, the one we're interested in is app.post('/requests/new',. We want to post a request to this server to create a new request.

Unfortunately, the model is called request. We're dealing with an application that has request a newsletter. Unfortunately, it's called requests and the reason that's unfortunate is because we're dealing with GET and POST requests. So it can kind of get confusing, but this is no different than things like /newsletter/new.
Basically, what we need to do is we need to provide a JWT token, which is what we put in our localstorage when we sign in or sign up. Then we need to provide a title, a body, a filename, and the ID of the user who posted it.
Let's get out of the server and let's go back into the client-side. This is our application that we've been working on, the property management application, or back in the client. First things first, we need the token. So let's say:
requests.js
export function createNewRequest(newRequest, success) {
    console.log('token: ',localStorage.getItem(token))
//     return function() {
//         axios.post(`${ROOT_URL}/requests/new`, newRequest)
//             then(response => {
//                 console.log(response.data);
//                 success();
//             })
//             .catch(err => {
//                 console.log(err);
//             })
//     }
// }
Now, the next thing we want to print out is the userId. We don't have the userId because we need to get it from our Redux Store and pass it into this request. First, let's just check if this console.log is working, and lets comment out our post-request, because we just want to see if this is working.
What we need to do is call this function, so we've got to export it. So let's go to our index.js and import it. It was called createNewRequest, and then we need to export it down here.

That is hooked up now. Now what we need to do is we need to actually call it. Let's go over to requestsNew.js. In here, on the onSubmit function, we need to call this function. In order to call it, we have the import our actions and connect it to React-Redux. So let's say:
requestsNew.js
import React, { Component } from "react";

import { connect } from 'react-redux';
import * as actions from '../../actions';
Make sure that you have these two imports in here, and now let's connect it at the bottom of our file. Let's scroll down here, and let's say:
requestsNew.js
NewRequest = connect(null, actions)(NewRequest);

export default NewRequest;
Now, that should be set up. Now we have access to our actions which means we can call it. So let's say:
requestsNew.js
class NewRequest extends Component {

  onSubmit = fields => {
    // if(button == 'submit') {
    //   // save new newsletter on the backend. perform a post request here.
    //   console.log('trying to submit to backend.');
    // }
    this.props.createNewRequest({}, () => {
        this.props.history.push("/dashboard");
    })
In this callback, this is where we will push to the dashboard. This is basically what we're calling success in requests.js. This is the callback. It's only going to call once we receive it, so we don't need to comment this out.
It's never going to push to the dashboard until we actually perform the request or call this. If I were to say success, it would call it, and we would go to the dashboard, but we don't want to call that right now.

We're just logging out the token. In here, we are calling it, passing in an empty object for the new request parameter, and then for success, we're putting in an arrow function that isn't going to be called. We should see a log in the console with our token.
Although, what we need to do first is make sure that we are required to sign it. Let's go into our bootstrap.js and let's get rid of this dashboard Route, and uncomment the one with requireAuth.
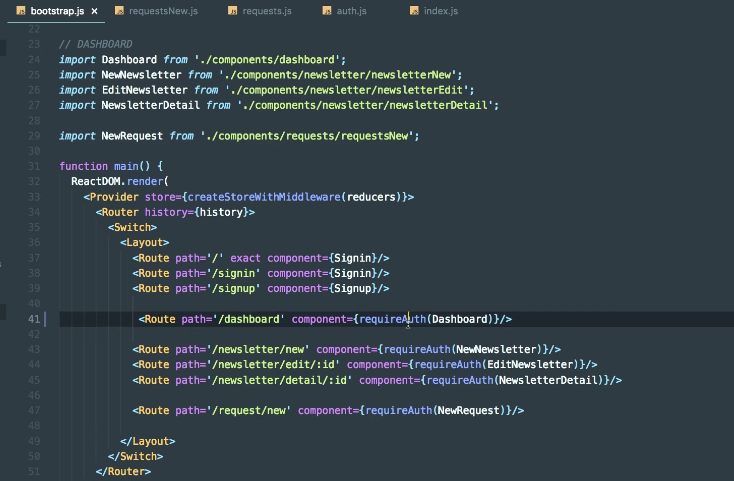
Now, even if we didn't do that, we would still be required to create it because /request/new requires Auth. As soon as we try to add one, it would make us log in, and then we'd have to go through and do it again. Anyway, I just wanted to get that back in there.
Let's close out of bootstrap.js and let's test it out. K case. When we log in, it's going to hit or sign in action. Let's go there now, well, let's go to the Reducer. So let's go to auth.js in actions. You'll see we're getting this token and we're setting it in local stores.

Let's go see if it's stored in localstorage. If it is, it will print out when we try to perform a request. We log in, it stores it in localstorage. Now, it should be in application and there should be a token here.

If there's not, try searching in this filter option. Search token and it might appear. If it's still not appearing, try clearing it and then reloading your app or closing out of your browser completely and logging in.
If it's still not working, make sure that you're typing in all this code for the sign in. Make sure you're storing it. Just to be sure, let's put this code right here, the localstorage.siteItem('token', token);, in sign in function in auth.js under actions. Move this code to after the dispatch.

Now I don't think that will really do anything, but I just want to be sure, so put it after that. I know it will store it if you put it after the dispatch for sure. Now that's in auth.js under the sign in function.
Let's go back to our application. Let's reload the page. I'm going to clear mine, just so it's empty and refresh it. I'm going to close out of the tab, and I'm going to go back to localhost:3000. So we're basically here for the first time right. No token in our application. The localstorage is empty.
Let's go ahead and log in. Then let's search for token, and you'll see there's a token in our localstorage. That should be good.

Now, what we want to do is see if it's printing out when we try and add a new request. Let's go to requests and hit new request and hit submit. We get some errors. Let's go to console. You'll see it says actions must be plain objects. Use custom middleware for async actions.

Essentially, what's happening is we're getting an error because we're not really doing anything in this function yet. So we're getting an error, but that doesn't matter because we know we're doing that. What we're focused on is the token. Let's see if that logged.
You'll see right above it it says token and we have access to our JWT token. What we need to do is provide this token with any requests we perform that require it. Sign in and sign up are the only ones that do not require a token. The rest will require us to be authenticated.
We only want someone creating requests if they have a token. If they have a token, then what we need to do is pass the userId of that user with the token, so that we can create a request or newsletter that is assigned to that user. So what we need to do now is pass in the userId.
We need to pass in the user ID this, not just the token. So real quick, let's go get that userId and pass it into our createNewRequest. Then we will uncomment this, and in the next video, we will perform the request and see if it's working.
Let's have it accept a parameter right before newRequest called userId. Let's put a comma, and let's just say:
requests.js
export function createNewRequest(userId, newRequest, success) {
    console.log('token: ',localStorage.getItem(token))
    console.log('userId: ', userId);
//     return function() {
//         axios.post(`${ROOT_URL}/requests/new`, newRequest)
//             then(response => {
//                 console.log(response.data);
//                 success();
//             })
//             .catch(err => {
//                 console.log(err);
//             })
//     }
// }
It's going to print out the userId we provide. If we run this now, it's not going to do anything because we didn't provide a userId. Let's go into requestsNew.js and we need to provide a userId right here. Like 10 or something. It's going to be a long string, but we need to provide it.

The way we can get access to this is by using Redux. We actually do need mapStateToProps so we can get access to the user. Let's go to Chrome. Hit Redux Devtools to the left, and you'll see that we don't have a user yet. Once we we log in, we'll be provided these a user.

Log in, and let's check the Redux Devtools. You'll see that we now have a user okay. We have a user here. So what we need to do is get access to this ID, so let's go grab it from mapStateToProps and then return state.auth.user.id.

All we have to do is say:
requestsNew.js
function mapStateToProps(state) {
    const { _id } = state.auth.user;
}

NewRequest = connect(mapStateToProps, actions)(NewRequest);
Let's log in and go back to the Devtools. So state.auth.user and then it takes the ID out of that. We're getting the ID out of state.auth.user and there's _ID.

Writing this is the same thing as writing this, just a little syntax difference. I'm going to do that. Then what we need to do is just return it. Let's say:
requestsNew.js
function mapStateToProps(state) {
    const { _id } = state.auth.user;
    return { _id }
}
Now, we have to access this from our props, so let's go up here and instead of passing 10 let's say:
requestsNew.js
  onSubmit = fields => {
    // if(button == 'submit') {
    //   // save new newsletter on the backend. perform a post request here.
    //   console.log('trying to submit to backend.');
    // }
    this.props.createNewRequest(this.props._id, {}, () => {
        this.props.history.push("/dashboard");
    })

  };
So we're signed in, we hit New Newsletter, we're brought to this form, we hit the button onSubmit, it comes back to here, and then it runs this and passes the ID we're getting from Redux. Then it goes into requests and it's going to console.log the token and the userId.
Let's go see if that's working, let's log in, let's go to requests, let's hit new request, and let's hit submit. We get that error, but we don't you worry about that. You'll see that we're getting a token. We have our JWT authentication token and then we have our unique userId.

What this means is we can authenticate the user, and say "hey, this is the user, they're signed into the application." They're authenticated. Then what we can do is take this form data that they've provided and let's create a new request object, like a new newsletter object but a request.
So a new request object for the apartment complex. Let's associate that request object with the user with this ID because they're the ones who clearly posted it. We only want to be able to show them this. We only want to show this request that's been made to them and the admin users.
That's why we're passing that in. Let's go commit our code and then in the next video will perform this post-request by passing in the token as a header and the userId as part of the body.
Let's commit our code. Let's say git status, git add ., and let's say git commit -m "snatched jwt auth token from local storage and provided createnewrequest with userid as well".