- Read Tutorial
- Watch Guide Video
Now if you've never heard of extensions or how to work with them with various text editors pretty much every major text editing platform out there has them in some form or another. Some of them might call them plugins or anything like that but this code calls them extensions you can see them on this bottom pane here.

You also can just type control + shift + X and it'll automatically come up and then right here you'll see any of the extensions that you have installed.

So the very beginning in the last guide I installed vim and even though I didn't say go install an extension this vim extension was installed automatically. And so if you installed any of those other ones like sublime or atom then you will see them right here.

Now below that there are some recommended ones and I'd definitely recommend for you to click on them and explore them, read them to see which ones might be the best fit for you.

None of these three are ones that I'm going to use just because I don't use those on my other computer. And they could be absolutely great and you may love them but I'm just gonna show you what I personally use during my day to day development. So I'm going to switch back to the readme here and we're going to walk through each one of these.

The first is this Babel ES6/ES7. This is just because with some of the JavaScript development that we'll do if you don't have an extension like this installed then the text editor may not realize that we're writing valid code because it may be looking at a earlier version of javascript. So what Babel allows us to do is to have the latest version, the most modern version of JavaScript picked up and give us some very helpful syntax highlighting.
So if you come over here to your extension search bar and you just paste that in it's going to go and it's going to find it. Now you can see there are a number of other options available.

But this very top one is the one that we want so you can click on it get some more information and it shows exactly what it does. So in certain circumstances, it'll fix any kinds of errors with the syntax highlighting. If you didn't have it installed and because we're going to be writing in the most modern version of JavaScript it can be helpful to have. Whenever you're installing an extension you can simply click on install and then it's going to go and install it inside of the editor.

Now if you want to use it right away you can just click on reload and it's going to reload the entire environment so that you can use it in your own files.

Now we're not going to do this after each extension because we have a little bit of a list here to use. Another one that I will use you can install if you want to have custom themes you can do that with extensions. Now, this is completely up to you and your own preferences and what colors you like, so you don't have to pick out the same color scheme that I have. This is more than anything I just put it in there so that you can see where you could go and you could pick out your own theme for your own custom colors.
If you click on this you can see that this gives you some options for your colors. This is the one I'll go with right now and you will notice as you go through the videos I like to play around with quite a few themes. I like to keep it nice and fresh so you'll see quite a few of them.

Now jsx if you're going through any react material jsx looks like html that you can place inside of your react code and so it's technically react code but whenever you're writing it if you do not have this tool installed then you might get some syntax highlighting issues so I'm going to search for the jsx one and you can see we have a number of different options on what you can have with jsx. So if you click right here and this is one option.

The second one JS JSX Snippets. This is the one where we're going to go with so I'll click on install here and that's going to be everything that we need.

And also you shouldn't feel like you're going to be married to a certain extension the second that you install it. You may just want to explore one and see exactly how it works and then if you come back into the extension's pane you can just click on uninstall and it will pull it right out of the system.

So feel free to explore and pick out all of the extensions that you want to have.
Now, this prettier one I'm gonna save this till the very end. And it's mainly because there is one other piece the configuration that we need to do in order to get it working. So we're going to go to the Quokka next and if I'm mispronouncing that I apologize in advance. I don't know how to pronounce it perfectly but I do love it. So Quokka is an incredibly helpful tool and you'll see me using this quite a bit in the javascript guides.
And so this is one I am going to reload the system for just so you can see a little preview of it so if I come up to this sample.js file. And also right now we're using the community free edition so that's what's popping up.

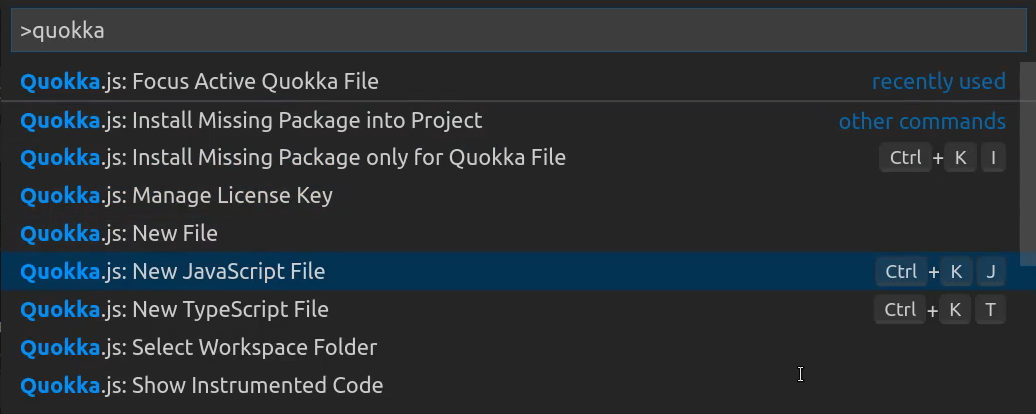
I have and I paid for myself the pro edition and just for some other helpful tools but don't feel like you need to do that so I'm going to click out of this and let's get rid of all of this react code and go and save the file. And if you open up the command pallet and you can do that by typing control + shift + P then this is going to allow you to use the Quokka extension and what it allows you to do is actually have your javascript code processed in line and what that means I'll show you here in a second if we can type. There you go. So there you go Quokka.js: Focus Active Quokka file.

If you click on that what we're going to be able to do now is to have this javascript code run right next to what we're doing. So usually what you need to do is to do so thing like console log and if I want to console log out what two plus two is I would have to go and I would need to open up the browser and then open up the javascript console and then see what that result is. But with Quokka and it looks like I need to control + shift + p again. I don't think I picked out the right one. I guess that and my computer I have my settings set up just a little bit differently with the production.
But let's come down here and I'm going to say new JavaScript file just to make it nice and easy.
There we go

Okay so if you do it that way as you can see it pops up this little window which is going to give you some output. And so now let's see the way this is going to work. So if I type console.log and it's if you have any errors it'll show them down here in your output and then you may notice that we have this spot where it says empty string

Watch what happens if I type console.log(2 + 2) you can see on the right-hand side. It actually processes all of our javascript code right here which is very cool.

We do not need to go and open up the browser and then open up the browser's console. It simply processes it all in real time as you're typing it. So this is one of my favorite tools to add to vs code because one it's very fun to use. I love seeing the code processing there in real time but it's also helps to make you even more efficient.
So I'm going to get rid of that console.log statement and actually I don't need to save it, that was just for example. So let's come back to our extensions and see what the next one on the list is, so we did Quokka. React native tools now depending on what track you're going through if you're not using React then you do not need to install this. This is only if you plan on building out react and react native types of applications.
I'm going to do it so I'm going to say install here and then it's going to install this one into the editor and we're not going to use it right now it's just a good one to have because it'll bring in some helpful snippets and some auto-completion tools. And looks like that loaded.

So let's come back to our checklist of extensions, vs code vim, I already have that installed and then this one is pretty neat too. It's called Debugger for Chrome and I'm going to come here and you'll see us using this throughout the course and so if I click on it and this one if you click out of the panel you'll see what this does. If you scroll down this allows you to add a break point to your application.

So it will allow you to come and inside of the text editor itself. So if you come to the index.html file you'll be able to actually go on the side just like you can see right here and set breakpoints

and then inside of the browser, it will go and it will pause the execution of your program so that you can debug it. And if you're new to development that may not sound like a big deal but I can tell you from experience that one of the things I spend the most time doing whenever I'm building out applications is debugging them and working with the data in this kind of way.
Because there are many times where an application does not do what I think it is supposed to do and I'm not getting the data that I want and using the debugger is a way where I can instantly pause and ask the system questions and so that is something that I think you will find very helpful as well.
And we're going to click and install it and then after it is installed we're going to reload the entire system just because we are on to our very last item which is prettier and this one's a fun one but it also requires a little bit of extra work. So as you can see up here in this file I have a prettier settings file and this has some settings that you can add and I'm going to switch back here and we can close out of these windows.
And so now we're going to search for prettier and so right here you can see the very top one by Esben Pieterson

I definitely recommend for you to explore exactly what it does but I'll show you how I use it. So if you click on install this is going to install it and then we'll reload and then after that, we will add our custom settings because this one does not work right out of the box. So actually while that's looting let's go take a look at the settings

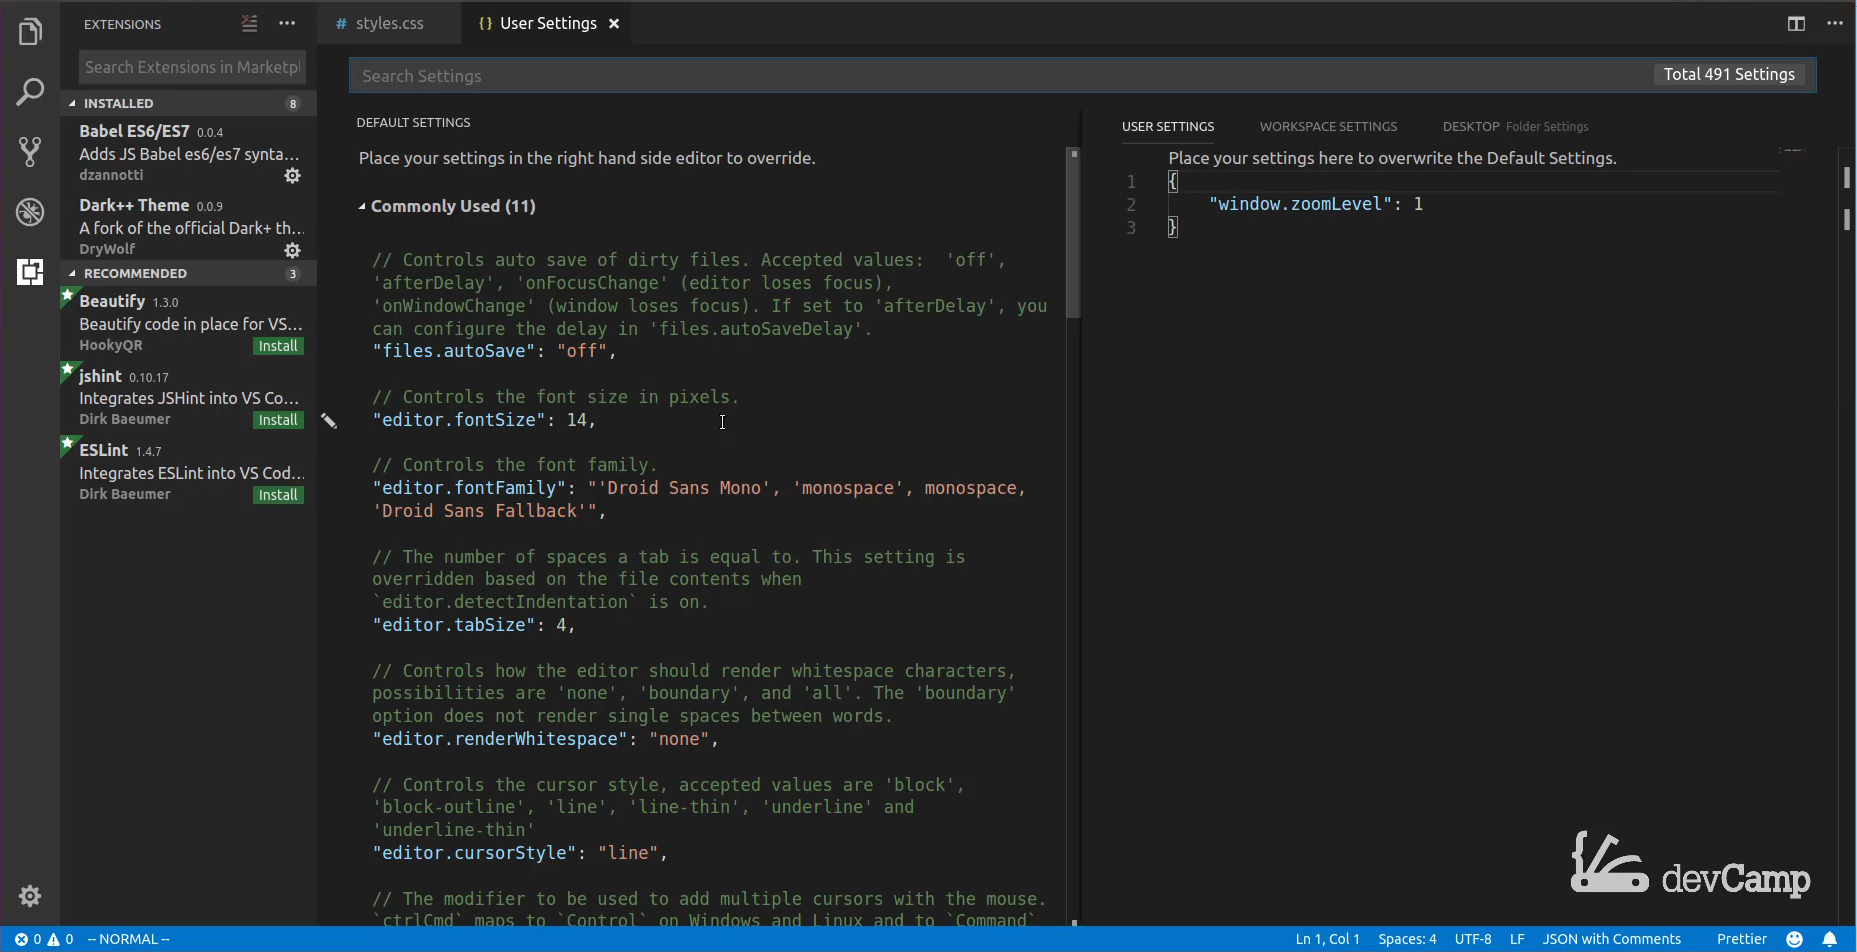
so you can see we're going to need to open the user's settings and you can do that with command and then a comma and then and this line into those user settings. So if I come back here, okay that all worked. We can reload and I'm going to just get out of all of these files just so we can have a little bit of clarity on what we're doing. And then the way that you can get to those settings once again is by just typing command or in this case, control if you're on a Linux box comma, and so you have a few different types of settings and I'm going to zoom out just a little bit just so we can see everything on the screen.
And so the way you can do that is by pressing control and then minus and then control plus is how you can zoom in. And usually I try to have zoomed in as possible so you can see everything with a nice big font.
For right now I think it makes it a little bit easier for you to see and not have everything jumbled up. So in addition to having our own custom settings here, this is also where we are going to be able to control any kinds of other settings that you have. So if you want to change to use two spaces instead of four for a tab, or if you want change the font size, or implement autosave, or change your font families all of that is placed right here.
Now we don't edit this file directly. Instead, we're going to come here and this is where we're going to add this line of code that we grabbed.

So this is going to tell the editor that we want to format on save. So I'm going to save this file close out and let's actually close out of the entire code editor. We'll open it up again and then you'll see exactly what this file does for us. I'm going to open up just a new JavaScript file, I think that would be the best example. So I'm going to save this as formatted.js save it and once again click out of these Quokka notifications and when you click on just community features only then these shouldn't pop up.

But now let's go and see how we can use this formatting. So if I come here and type something like const myVar = and then create some type of function here. So this is going to be a very very basic function and it's going to be an arrow function in JavaScript. And now I'm not going to use the right formatting by default. So I'll console log and say something like oops so I can use all kinds of horrible practices here with my formatting.
const myVar = () => {
console.log('Oops');

}
So this is not the way you'd want your javascript code to look and then I'm going to come down here and say myVar and call it. But instead of doing it right I'm actually going to have it all indented here and so this is very badly written or badly formatted javascript, you would not want to show this to any developers.

What prettier does is whenever you save the file. It will actually format this for you so I'm going to save this file and look at that. It not only formatted it, it also added semicolons where we needed them, it fixed this indentation here, and now this looks like professional javascript code.

So this is something that's incredibly helpful. I've worked with a number of different auto-formatting tools in the past and I haven't really been a fan of any of them but the one thing I love about prettier is they just did a great job with this one. It's made from some developers at Facebook and they said they were inspired from seeing all kinds of different formatting and many times this formatting is very difficult to read.
So what this does is it helps to make all of the code you write conform to formatting best practices and so this is one of my favorite ones to use. And it's not just for junior developers either, I went to an advanced React training workshop with the main developer of the React router and he uses prettier on his systems. Every time he was saving his files they were getting reformatted and arranged like this and so it's definitely something you're going to find in the industry quite a bit and people who are reading your code are going to appreciate it. So once again this is my list of favorite plugins and my settings and you can find all of these on this page which I will share in the show notes.