- Read Tutorial
- Watch Guide Video
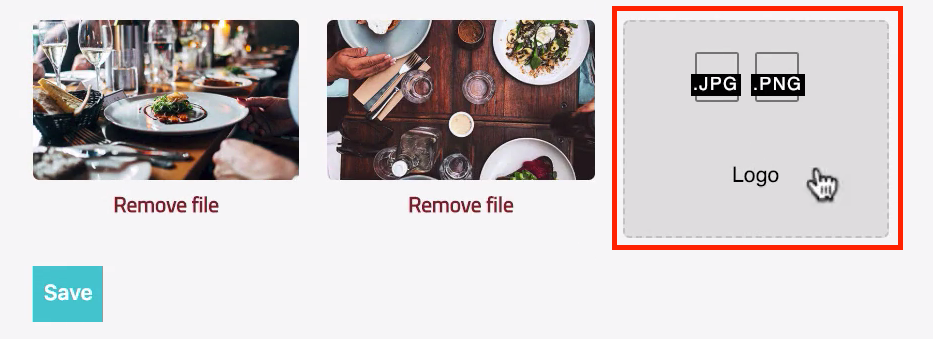
So, before we get into writing the code, let's walk through exactly what we're looking to do. I wanna be able to click edit and then if there is an image here, I want to remove the file, so if I click remove file, I want that to contact the outside API and say this file should be deleted.
In order to do that, we need a couple of pieces of information. We need to know the ID for the record, so for example, if I wanna remove this thumb image, the API has to know that I wanna remove the thumb image for this specific record, for this portfolio item because if I just pass it thumb record and delete, it's not gonna know. Does this belong to the one called another one? Is it for testing it again? It is for Ministry Safe? It's not gonna know that. So, we have to grab the ID, thankfully we are already doing that.
If you look inside of the code, we don't have an ID inside of our state if it's a new record because the ID is something that gets assigned in the database automatically, so new records will not have that. But if we're in edit mode, if you remember, when we are in edit mode and we grab that portfolioToEdit record, we're grabbing the ID because the ID is something that gets sent back to us whenever we click on Edit, so we do have access to the ID.
On top of that, we have to tell the API which one of the images to delete. So, the way that I have it structured, now every API's gonna be a little bit different, so I'm gonna add that as a caveat. You might work with a system where the API allows you to pass in an ID for the image directly, so every API's gonna be structured uniquely.
In this case, how I structured it is you pass in the ID for the record and then you pass in as an optional argument, the type of image it is, so we're gonna say this is gonna be either a thumb image or it's going to be a banner image or a logo, that's the reason why our delete method needed to take in all of those arguments. So, it's already doing that, we simply need to build that out.
So, inside of deleteImage, let's get rid of this console.log statement and we're gonna call axios, so I'm gonna say axios.delete and this next part, the first part of the string is going to be the API endpoint as usual. We've done this before and this is something that if you're working on a different API, you're gonna have instructions on exactly what that API endpoint is going to be.
The reason why I keep saying that is because one of the most common questions I'll usually get around working with APIs is how in the world do you know to type what you're typing right now? And there's no magical answer to that. Every single API's gonna be completely different. It's gonna have is own set of rules, it's gonna have its own URLs but the pattern that we're following right here is a very common approach. So, I'm gonna start off going to https://api.devcamp.space/portfolio/delete-portfolio-image spelled out exactly like that and make sure you're using back ticks because the next part is going to be using string interpolation.
portfolio-form.js
deleteImage(imageType) {
  axios.delete(`https://api.devcamp.space/portfolio/delete-portfolio-image`)
}
Remember I told you, we need to pass in the ID for the portfolio item record and then the type, so I'm gonna say slash, the next part's gonna be the ID, so I'll say dollar curly bracket, and then this.state.id and then close off your curly bracket and then after that, I'm gonna add a question mark.
Remember when we're working with APIs and we want to add extra information and this is something the API has to build in, so not all APIs are gonna do this but most APIs do allow for optional parameters to be sent and the way you can do that inside of the URL is to add a question mark, I'm gonna get rid of this right here just so it makes it a little bit easier to read. So, you add a question mark and then you add the name of the parameter that you wanna pass in.
So, in this case, what the API needs is a parameter called image_type and so, now we can say image_type equals and then we're gonna use some more string interpolation, so I'm gonna say image_type equals and then just imageType and remember imageType is what we're getting inside of the argument, that's the reason why we're passing in logo and all of those items.
So, we're passing in imageType and that is all that we need to do with the URL, so after that string is ended, now we can just type withCredentials true and I need to put that in an object, so withCredentials true and hit save and Prettier will make that formatted for us a little bit better.
deleteImage(imageType) {
  axios.delete(
    `https://api.devcamp.space/portfolio/delete-portfolio-image/${this.state
      .id}?image_type=${imageType}`,
    { withCredentials: true }
  );
}
So, you can see, we have our URL. It's gonna call the delete-portfolio-image endpoint, we're passing in the ID which we get from state from the portfolioToEdit and then we're passing in an optional parameter of image_type and we're getting the imageType from that link and we're passing from then in withCredentials true.
So, now with all of that in place, now we can call then to say what we want to happen, so I'm gonna say response and then a fat arrow function and for right now, let's just console.log this out, so console.log deleteImage, response and then as always, we're going to catch any server errors or anything like that, so we'll catch the error and we will simply print it out, so we'll say deleteImage error and then print out the error.
deleteImage(imageType) {
  axios.delete(
    `https://api.devcamp.space/portfolio/delete-portfolio-image/${this.state
      .id}?image_type=${imageType}`,
    { withCredentials: true }
  ).then(response => {
    console.log("deleteImage", response);
  }).catch(error => {
    console.log("deleteImage error", error);
  })
}
For right now that's all we need to do and then after this we'll see how we can update our state. So, let's come here and click on any of these records. So, I'm gonna click on this Testing again record because it has three to work with and now keep in mind, nothing is gonna happen visually right here, right now I just wanna make sure that we're communicating with the server properly.
So, I'm gonna delete the logo for testing it again, so if I click Remove file, let me open up the console, it looks like we didn't get any errors and we did get a deleteImage response back.

So we have the status with data of 204 and that means that it should have worked. So, I'm gonna hit Refresh and then come and click on testing it again and you can see that worked perfectly. We no longer have a logo there, so that is exactly what we're looking for.
Now I could click on this and I could add it in again and you can see that we're back to drop zone using the correct process.

I'll click Save and then if you come back, click testing it again, you can see that our logo is now there, so everything there's working perfectly. Now let's go and let's update the state. So, I'm gonna come back to Visual Studio Code, we don't care about console.logging this anymore. Now what we're gonna do is say if that worked, then we can say this.setState and inside of setState, this is where we are going to update the value but we have to be dynamic with it because we have to work with three different image types.
So, the way we can do that, and we've done this before but it's been a while, so if this syntax looks a little weird, do not worry, we're going to setState but whenever you're setting state dynamically where you do not know the exact name of the key, remember we wrap that inside of a bracket.
So, I'm gonna have the bracket here and then we're gonna use some string interpolation. So, I'm gonna say inside of back ticks, I'll use the dollar curly bracket, imageType, so this is the same imageType that we got up here but remember, our imageType now also has the _url because when we fixed our bug, we added this into state.
So each one of the state items, if we're in edit mode, if it's an image, it has _url, so this is actually what we wanna clear off. We wanna make sure we're not just doing the logo or the thumb image, we need the URL and that should be everything we need there and now we just want to set it to an empty string. So, this should be everything we need, let's just review.
We're deleting the image, we know that this part works. When we get the response back, we're updating state and we're saying whatever that imageType was with _url, we want to clear that off and so, what that's going to effectively do is if you come down into our conditional, so if you come down and look at any of the drop zone components, like this banner_url one, this conditional, even if we're in edit mode, is going to return false because this.state.banner_image_url, this is now gonna be empty and so, what's gonna happen if everything works is it's no longer going to be true, so it's not gonna show our new thumb image, instead it's going to come down into this false condition and it's gonna show the drop zone component.
So, let's test this out, I'm gonna hit Refresh and let's click on another one here. You can see that we have a thumb image. If I click Remove File, it is now cleared and it's gone. You can hit Refresh and you can see, on the right-hand side, another one no longer has a thumb image.

You can click Edit and you can upload a few images, so let's test this out. I'm gonna add two of them, and I'll hit Save, so this should be updated. You can see Another one now does have a thumb image and all that happened automatically.

If I click Edit, we have our two records, once again let's hit Remove File here and let's upload a different image. You can see that drop zone component's now working just like normal. Hit Save and then if you come back and click Edit, you can see we have an image there.

So, I know that's quite a bit of work for what may seem like a relatively trivial normal feature but hopefully, you can see all of the different workflows that needed to be implemented in order to build this properly. We needed to be able to have our drop zone component in the very beginning, that is what allowed us to upload images in the first place.
But the dropzone component doesn't work well in Edit mode. You don't really have the same ability to pipe in the data you want, so what we did is we created a thumb image and that became the new default in edit mode and then from there, we're able to build out our own delete process and simultaneously update state in order to get our dropzone component back.
If that is still fuzzy, do not worry, what we just walked through is definitely on the non-trivial side. So, what my recommendation would be is to go through all of that code that we wrote out, really become familiar with it, see exactly what's happening especially on the spots where we're setting state. I can tell you that that's gonna be one of the biggest keys here in you understanding this.
So, each time we're calling setState, what we're doing is we're essentially creating a state machine for this process. We're saying if you have this state condition such as having a thumb image URL, then I want you to perform these other tasks such as not showing dropzone but instead showing this other thumb image URL component that we built out and follow all of the spots where state's changed and when you do that, you'll start to see the way the data flow works and you'll almost look at the application instead of trying to look at it kind of at this high level, you'll start to look at your application in a series of states.
You'll see all of the different conditions that occur in one state versus another and it's not just related to this one component. What I'm talking about hopefully will help you understand React period. Think about the state of being logged in, if that doesn't exist, if we're not logged in, you don't even have access to some of these routes such as the Portfolio Manager, the route doesn't even exist. That is also a form of a state machine where we're saying if this one item exists or if it doesn't, then we're gonna change the behavior of the entire application and that's gonna be something that you're gonna see as a pretty predominant pattern in all of the React that you write.
So, great job if you went through that, we're completely done with this Portfolio Manager. I know that that was quite a bit of work but you did a fantastic job in going through that. That was definitely on the non-trivial side and in the next section, we are going to start building out our blog component and you're gonna be very close to being done with this entire application.
You're gonna have your own portfolio and along the way, you're gonna have learned how to build React applications.